Installation and Administration Guide
Introduction
This Installation and Administration Guide covers RSS-RI version 4.4.3. Any feedback on this document is highly welcomed, including bugs, typos or things you think should be included but aren’t. Please send it to the “Contact Person” email that appears in the Catalogue page for this GEi.
System Requirements
Hardware Requirements
The following table contains the minimum resource requirements for running the RSS:
- CPU: 1-2 cores with at least 2.0 GHZ
- Physical RAM: 2GB
- Disk Space: 10GB The actual disk space depends on the amount of transactions strored in the database.
Operating System Support
The RSS has been tested in the following Operating Systems:
- Ubuntu 12.04, 14.04
- CentOS 7.0
Software Requirements
In order to have the RSS running, the following software is needed. However, these dependencies are not meant to be installed manually in this step, as they will be installed throughout the documentation:
- Java JDK 7
- Apache Tomcat 7
- MySQL >= 5.5
Software Installation
Getting the RSS Software
The packaged version of the RSS software can be downloaded from:
This package contains the war files of the RSS as well as the installation scripts used in this document.
Alternatively, it is possible to install the RSS from the sources published in GitHub. To clone the repository, the git package is needed:
# Ubuntu/Debian
$ apt-get install git

# CentOS
$ yum -y install git
To download the source code usig git, execute the following command:
$ git clone https://github.com/conwetlab/fiware-rss.git
Installing the RSS Using Scripts
In order to facilitate the installation of the RSS, the script install.sh has been provided. This script installs all needed dependencies, configures the RSS and deploys it.
Note
The script install.sh installs java and tomcat. If you have those systems already installed, you may want to install the RSS manually as explained in the next section.
To use the installation script execute the following command:
$ ./install.sh
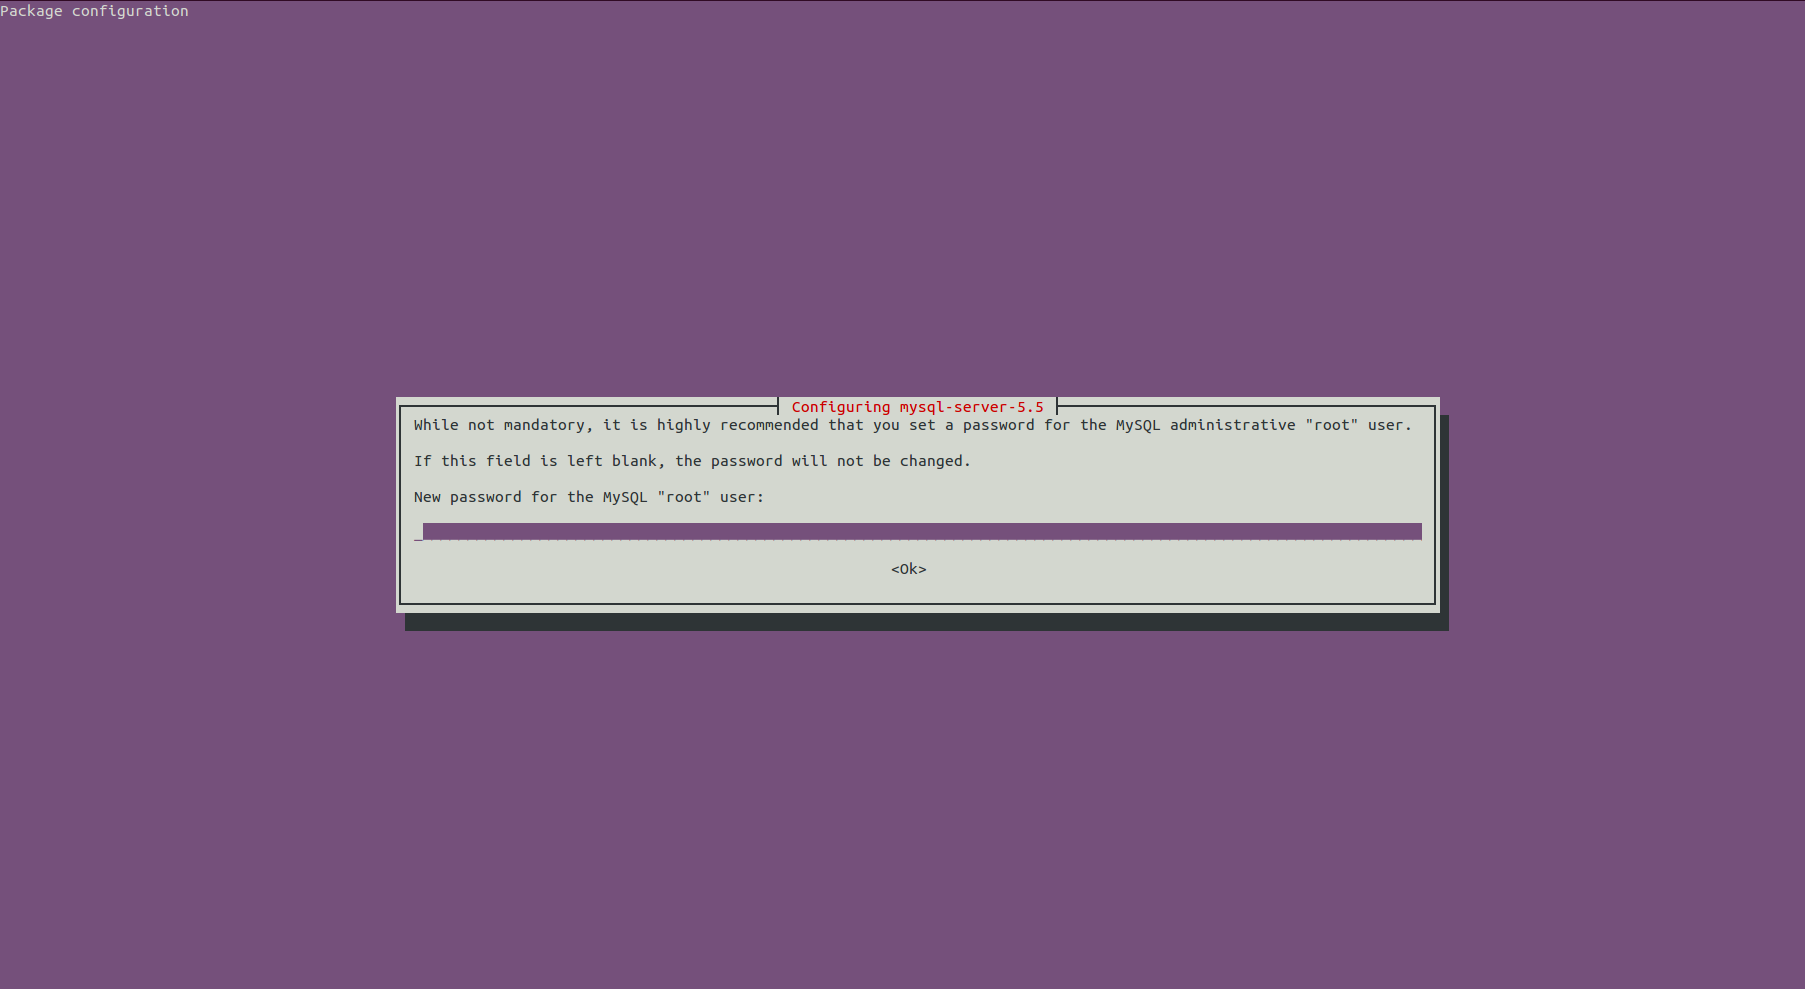
The installation script, installs MySQL and creates the root user. During this process you will be asked to provide a password for this user:
- Ubuntu
CentOS
NOTE: RUNNING ALL PARTS OF THIS SCRIPT IS RECOMMENDED FOR ALL MySQL
SERVERS IN PRODUCTION USE!  PLEASE READ EACH STEP CAREFULLY!

In order to log into MySQL to secure it, we'll need the current
password for the root user.  If you've just installed MySQL, and
you haven't set the root password yet, the password will be blank,
so you should just press enter here.

Enter current password for root (enter for none):

OK, successfully used password, moving on...

Setting the root password ensures that nobody can log into the MySQL
root user without the proper authorisation.

Set root password? [Y/n] y
New password:
Re-enter new password:
Password updated successfully!
Reloading privilege tables..
    ... Success!

By default, a MySQL installation has an anonymous user, allowing anyone
to log into MySQL without having to have a user account created for
them.  This is intended only for testing, and to make the installation
go a bit smoother.  You should remove them before moving into a
production environment.

Remove anonymous users? [Y/n]

Normally, root should only be allowed to connect from 'localhost'.  This
ensures that someone cannot guess at the root password from the network.

Disallow root login remotely? [Y/n]

... skipping.

By default, MySQL comes with a database named 'test' that anyone can
access.  This is also intended only for testing, and should be removed
before moving into a production environment.

Remove test database and access to it? [Y/n]

Reloading the privilege tables will ensure that all changes made so far
will take effect immediately.

Reload privilege tables now? [Y/n]
Then, the installation script creates the RSS database. In order to be able to do that, you are asked to provide root MySQL credentials.
'RSS' database is going to be created, Please introduce your mysql user and password with administration permissions (i.e root user).
> user:
root
> Password:
The RSS uses the FIWARE Identity Manager for authenticating users. In this regard, the installation script asks you to provide valid OAuth2 credentials for your application. Additionally, it is also required to include the URL where the service is going to run (only host and port). You can find more details on how register your RSS instance in the IdM in section OAuth2 Configuration
------------------------------------------------------------------------
The RSS requires a FIWARE IdM to authenticate users. Please provide valid FIWARE credentials for this application
> FIWARE Client ID:
{FIWARE CLIENT ID}
> FIWARE Client Secret:
{FIWARE CLIENT SECRET}
> Include the URL (including port) where the RSS is going to run:
http://[HOST]:[PORT]
During this installation process, the properties files are created in /etc/default/rss using the provided information.
Manually Installing the RSS
Installing Basic Dependencies
The basic dependencies of the RSS can be easily installed using apt-get or yum, depending on the system.
Ubuntu
# apt-get install -y openjdk-7-jdk tomcat7 mysql-client mysql-serverCentOS
# yum install -y java-1.7.0-openjdk-devel tomcat
# rpm -Uvh http://dev.mysql.com/get/mysql-community-release-el7-5.noarch.rpm
# yum -y install mysql-community-server
# /usr/bin/systemctl enable mysqld
Compiling Source Code
If you have downloaded the source code of the RSS from its GIT repository, you will need to compile the sources. To do that it is needed to have maven installed.
Ubuntu
# apt-get install mavenCentOS
# yum install maven
Once maven is installed, you can compile the source code executing the following command:
# mvn install
Note
In this case war files will be available at fiware-rss/target/fiware-rss.war and rss-expendLimit/el-server/target/expenditureLimit.war
Deploying the Software
The RSS reads its properties from database.properties and oauth.properties files, located at /etc/default/rss, so the first step for deploying the RSS is creating this directory.
# mkdir /etc/default/rss
Once this directory has been created, the next step is copying the properties files (located in the properties folder) to this location.
# cp properties/database.properties /etc/default/rss/database.properties
# cp properties/oauth.properties /etc/default/rss/oauth.properties
The concrete values contained in the properties files are described in Configuration section.
Finally, the last step is deploying the war files in Tomcat.
Ubuntu
# cp fiware-rss.war /var/lib/tomcat7/fiware-rss.war
# cp expenditureLimit.war /var/lib/tomcat7/expenditureLimit.war
CentOS
# cp fiware-rss.war /var/lib/tomcat/fiware-rss.war
# cp expenditureLimit.war /var/lib/tomcat/expenditureLimit.war
Configuration
This section explains how to configure the RSS. If you have used the provided script, you can skip this step as your properties files are already created. However, it is highly recomended to read this section in order to understand the existing preferences.
Database Configuration
Database connection in configured in /etc/default/rss/database.properties, which has the following structure:
## Filter usage
database.url=jdbc:mysql://localhost:3306/RSS
database.username=root
database.password=root
database.driverClassName=com.mysql.jdbc.Driver
This file contains the following properties:
- database.url: URL where the MySQL database is located. it includes the host, the port, and the database name.
- database.username: User name used to access the database.
- database.password: Password of the user used to access the database.
- database.dirverClassName: Name of the driver class used to connect to the database
OAuth2 Configuration
TThe RSS uses the FIWARE Identity Manager. In this regard, it is needed to register the application in this system in order to retrieve valid credentials. For registering the application is required to provide the following information:
- A name.
- A description.
- The URL of the RSS. Must be something like http://[HOST]:[PORT]/fiware-rss/
- The callback URL of the RSS. Must be something like http://[HOST]:[PORT]/fiware-rss/callback?client_name=FIWAREClient
OAuth2 information is configured in /etc/default/rss/oauth.properties, which has the following structure:
############## IDM configuration ################
config.baseUrl=https://account.lab.fiware.org
config.logoutPath=/auth/logout
config.client_id=
config.client_secret=
config.callbackURL=http://localhost:8080/fiware-rss/callback
config.callbackPath=/callback
config.authorizeUrl=/oauth2/authorize
config.accessTokenUrl=/oauth2/token
config.userInfoUrl=/user?access_token=
config.grantedRole=Provider
This file contains the following properties:
- config.baseUrl: URL of the FIWARE Identity Manager used to authenticate users.
- config.logoutPath: URL path used for logging out users from the RSS.
- config.client_id: ID of the application in the identity manager.
- config.client_secret: Secret of the application in the identity manager.
- config.callbackURL: URL of the RSS used to receive authorization callbacks.
- config.callbackPath: URL path of the RSS used to receive authorization callbacks.
- config.authorizeUrl: URL path of the identity manager used for making authorization requests.
- config.accessTokenUrl: URL path of the identity manager used for making access token requests.
- config.userInfoUrl: URL path of the identity manager used for retrieving user information.
- config.grantedRole: Role defined in the application in the identity manager for identifying admins of the RSS.
Sanity check procedures
The Sanity Check Procedures are those activities that a System Administrator has to perform to verify that an installation is ready to be tested. Therefore there is a preliminary set of tests to ensure that obvious or basic malfunctioning is fixed before proceeding to unit tests, integration tests and user validation.
End to End testing
Although one End to End testing must be associated to the Integration Test, we can show here a quick testing to check that everything is up and running. The following process can be performed by a system administration in order to verify the installation.
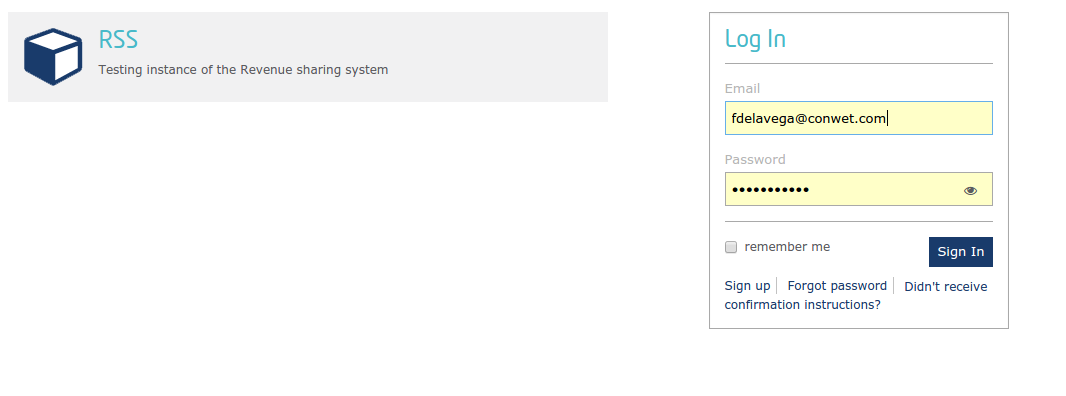
- Access the URL of the RSS (http://HOST:PORT/fiware-rss). You should be redirected to the IdM in order to login.
- Register a new Store, providing the admin email and a display name.
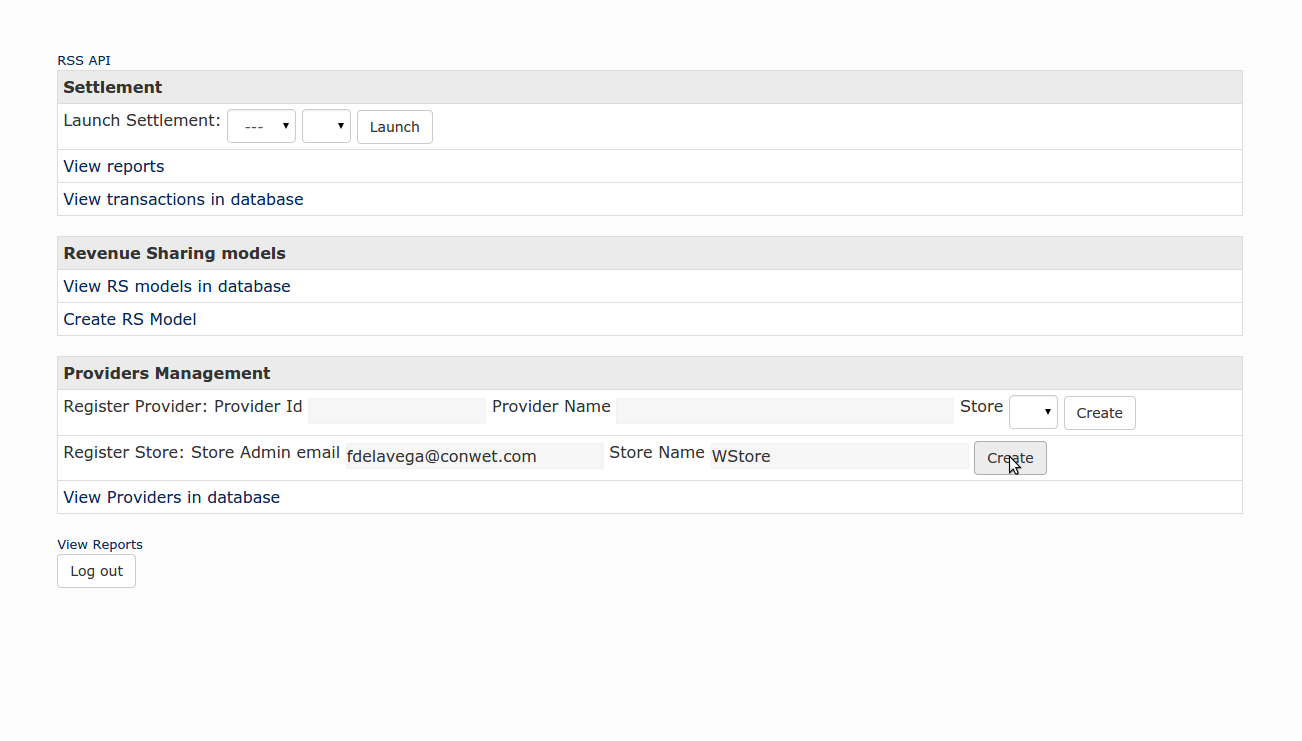
- Register a new provider, including an id and a display name, and selecting the previously registered store.
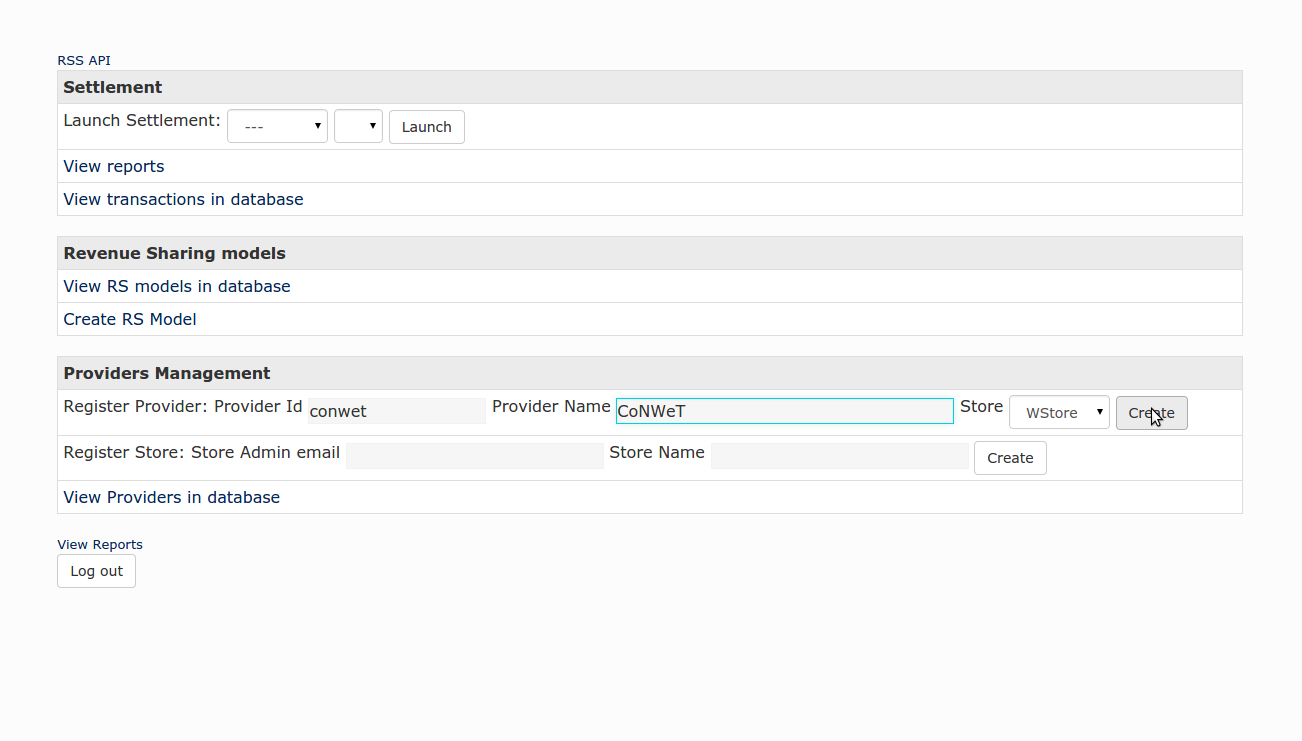
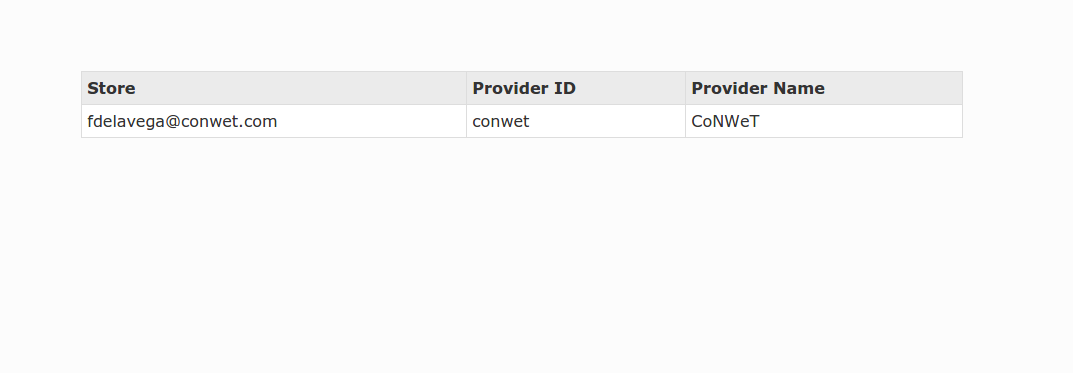
- Verify that the provider has been created by clicking on View Providers in database.
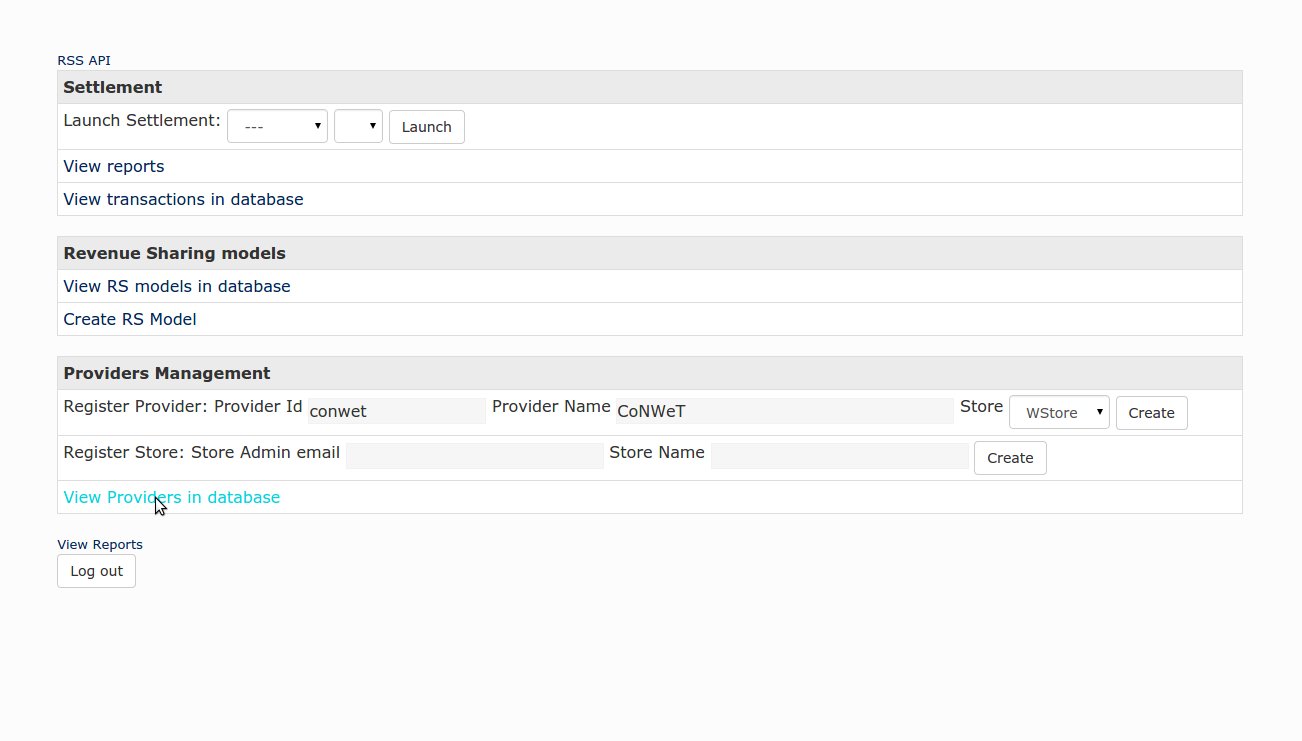
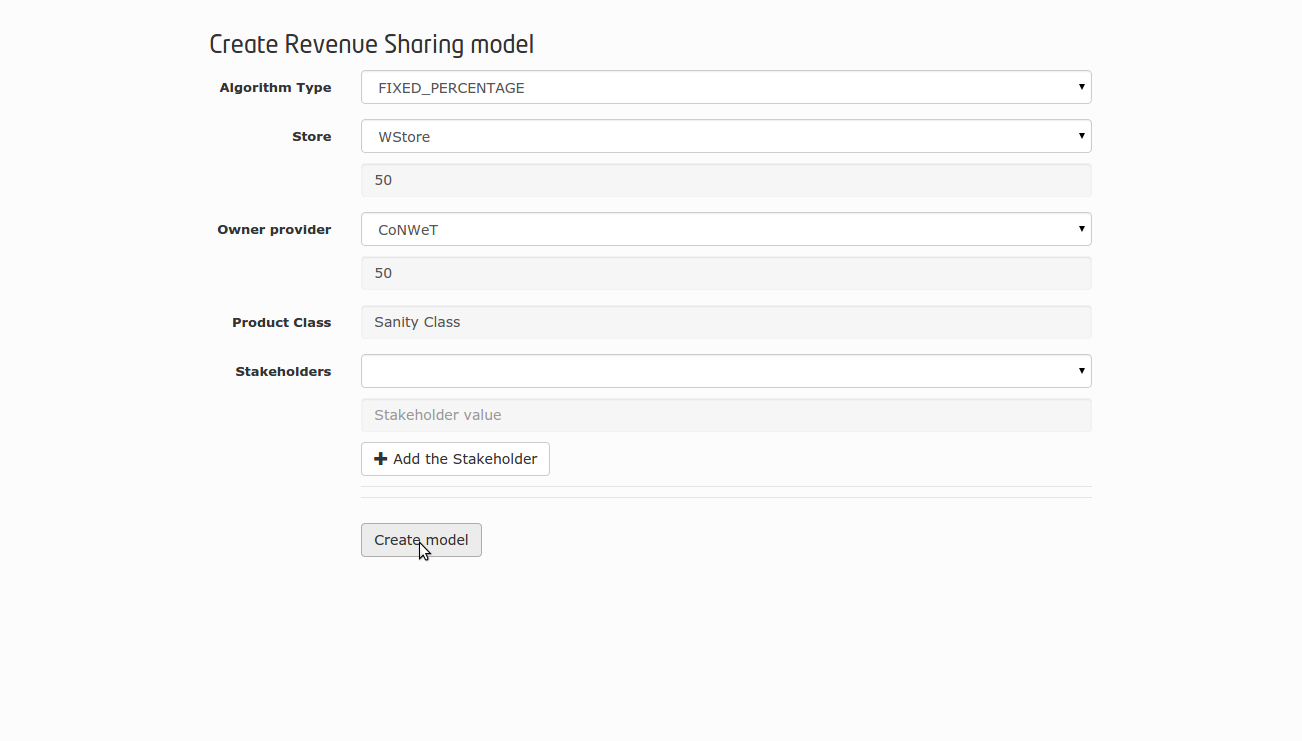
- Go back to the home page and click Create RS model.

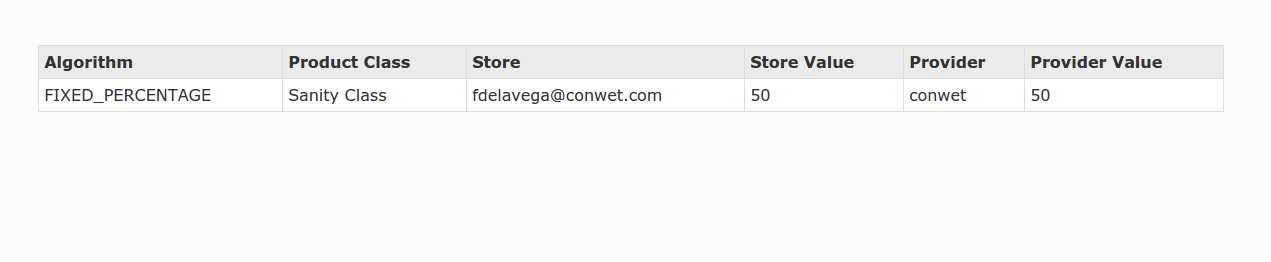
- Include a percentage value for the store and for the provider (The total must be equal to 100). Provide a product class for identifying the model and click on Create.
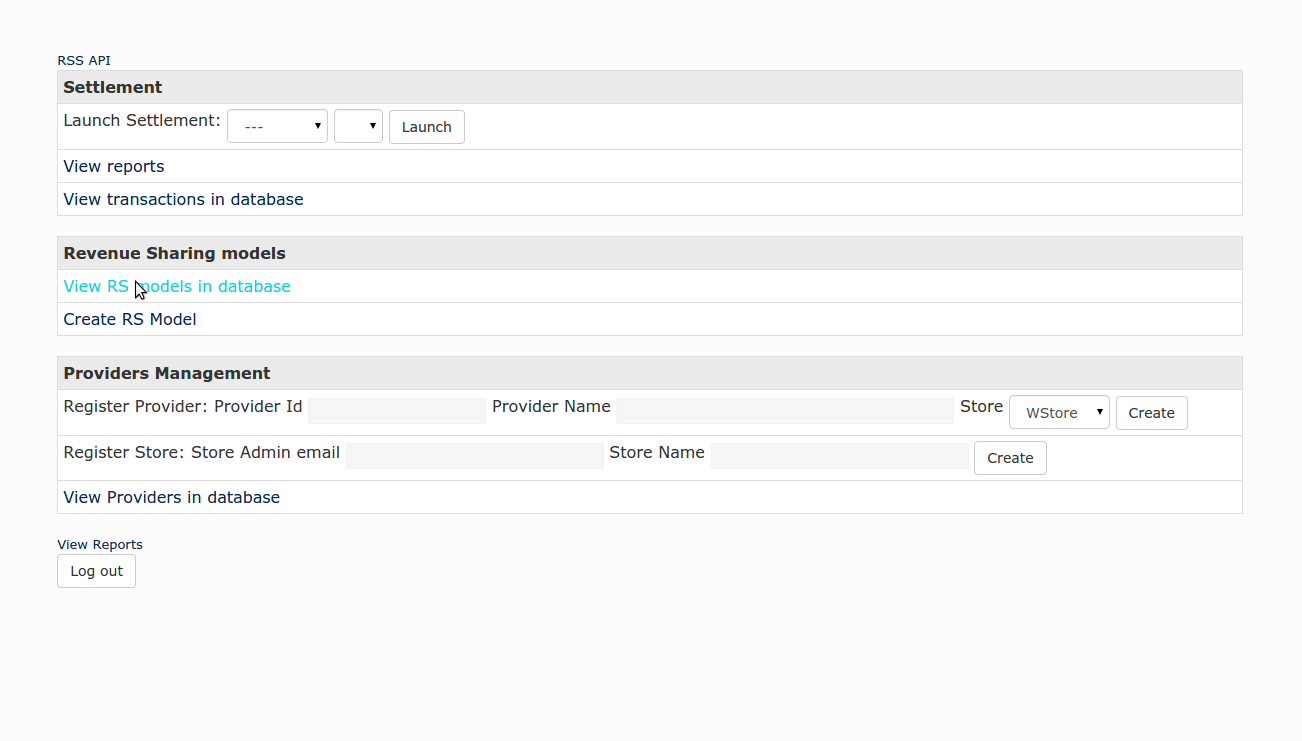
- Go back to the home page, and verify that the model has been created clicking on View RS models in database.
List of Running Processes
You can execute the command ps -ax | grep 'tomcat\|mysql' to check that the Tomcat web server and the MySQL database. It should show a message text similar to the following:
23397 ?        Ssl    0:00 /usr/sbin/mysqld
24459 ?        Sl     1:15 /usr/lib/jvm/java-7-openjdk-amd64/bin/java -Djava.util.logging.config.file=/var/lib/tomcat7/conf/logging.properties -Djava.util.logging.manager=org.apache.juli.ClassLoaderLogManager -Djava.awt.headless=true -Xmx128m -XX:+UseConcMarkSweepGC -Djava.endorsed.dirs=/usr/share/tomcat7/endorsed -classpath /usr/share/tomcat7/bin/bootstrap.jar:/usr/share/tomcat7/bin/tomcat-juli.jar -Dcatalina.base=/var/lib/tomcat7 -Dcatalina.home=/usr/share/tomcat7 -Djava.io.tmpdir=/tmp/tomcat7-tomcat7-tmp org.apache.catalina.startup.Bootstrap start
24921 pts/0    S+     0:00 grep --color=auto tomcat\|mysql
Network interfaces Up & Open
To check whether the ports in use are listening, execute the command netstat -ntpl. The expected results must be somehow similar to the following:
Proto Recv-Q Send-Q Local Address           Foreign Address         State       PID/Program name
tcp        0      0 0.0.0.0:22              0.0.0.0:*               LISTEN      -
tcp        0      0 127.0.0.1:3306          0.0.0.0:*               LISTEN      -
tcp6       0      0 :::22                   :::*                    LISTEN      -
tcp6       0      0 127.0.0.1:8005          :::*                    LISTEN      -
tcp6       0      0 :::8080                 :::*                    LISTEN      -
Databases
In order to check that MySQL is running and that the RSS database has been set up, MySQL client can be used.
- Open MySQL Client and enter RSS database:
$ mysql -u root -proot RSS
Reading table information for completion of table and column names
You can turn off this feature to get a quicker startup with -A

Welcome to the MySQL monitor.  Commands end with ; or \g.
Your MySQL connection id is 143
Server version: 5.5.41-0ubuntu0.14.04.1 (Ubuntu)

Copyright (c) 2000, 2014, Oracle and/or its affiliates. All rights reserved.

Oracle is a registered trademark of Oracle Corporation and/or its
affiliates. Other names may be trademarks of their respective
owners.

Type 'help;' or '\h' for help. Type '\c' to clear the current input statement.

mysql>
- Check that tables has been created:
mysql> show tables;
+-----------------------------+
| Tables_in_RSS               |
+-----------------------------+
| bm_country                  |
| bm_currency                 |
| bm_customer_type            |
| bm_language                 |
| bm_methods_of_payment       |
| bm_ob                       |
| bm_ob_country               |
| bm_ob_mop                   |
| bm_paymentbroker            |
| bm_pb_mop                   |
| bm_price_point              |
| bm_product                  |
| bm_product_vs_ob            |
| bm_servdeploy_mop           |
| bm_service                  |
| bm_service_deployment       |
| bm_service_product_type     |
| dbe_aggregator              |
| dbe_aggregator_appprovider  |
| dbe_appprovider             |
| dbe_appprovider_application |
| dbe_expend_control          |
| dbe_expend_limit            |
| dbe_system_properties       |
| dbe_transaction             |
| set_revenue_share_conf      |
| share_conf_provider         |
+-----------------------------+
27 rows in set (0.00 sec)
Note
This Test is asumming that you are using the user root with password root and a database called RSS.
Diagnosis Procedures
The Diagnosis Procedures are the first steps that a System Administrator will perform to locate the source of an error in the Application. It is to be considered a first line of support diagnosis; once identified, it can be passed onto a higher level for specific analysis. This however, is out of the scope of this section.
The first step that can be follow in order to locate a problem is running the tests of the software:
$ mvn test -fae
Apart from the tests specified in the standard sections that follow, the logs can provide relevant diagnosis information:
- The logs of the RSS and RSModels API are stored in {Apache Tomcat Installation}/logs/fiware-rss/main.logs
- The logs of the Balance Accumulate and Limit Management API are stored in {Apache Tomcat Installation}/logs/expendLimit/expendLimit.log
Resource availability
The resource load of the RSS strongly depends on the number of concurrent requests received as well as on the free main memory and disk space. In this regard, the application will run correctly if the system adheres to the minimal requirements.
Resource consumption
There are two main processes consuming resources:
- MySQL Server
- 2 Apache Tomcat Server
Resource consumption strongly depends on the load, especially on the number of concurrent transactions and in the number of concurrent requests by administrators. So, the expected resource consumption for these processes is quite low.
I/O flows
The only expected I/O flow is of type HTTP or HTTPS, on ports defined in Apache Tomcat configuration files, inbound and outbound. Requests interactivity should be low.